Latch
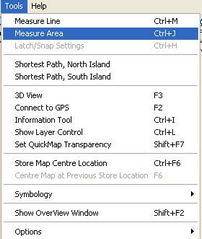
Once the Measure function from the Tools Menu has been selected, it is then possible to select the Latch/Snap Setting option through the Tools Menu, or Ctrl/M.
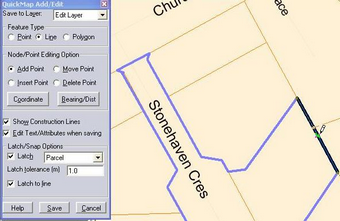
Placing a tick in the Latch tick box causes each point placed to snap onto a point in the latch layer if it is within tolerance. Layers can be selected from the pull down list (if they were visible before you opened the QuickMap Add/Edit form).
The latch tolerance specifies the distance in meters on the ground your cursor is to a point in the Latch layer before a place point will snap to that position when the left mouse button is clicked to place the point. The mouse is required to be inside the polygon to be able to latch.
Tracing Features
Once you have latched to an object, you can trace along a feature by holding down the Shift or Control Keys. The Shift key traces along the feature in the reverse direction to the Control key. Tracing features save time when your feature has a large number of points such as a road, coastline or natural boundary. (At this stage it is not possible to latch to Topographical datasets, but this functionality will be enabled when the Topographical data is updated).
To trace along a feature:
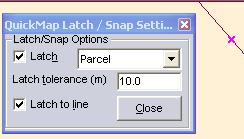
| 1. | Turn on Latching. |
| 2. | Choose the layer that contains the feature you want to trace from the drop down pick list of available layers. |
| 3. | Set the latch tolerance to an appropriate value (The best value for this will be dependent on the scale of the map) |
| 4. | Click on the point of the feature where you want to start the tracing. The mouse |
| 5. | While moving the mouse over the feature to be traced, hold down either the Shift or Ctrl key. The feature will be traced from the current point to the point of the traced feature nearest the mouse location. |
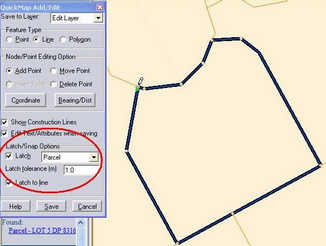
If the feature that is being latched to is a polygon then Shift will trace via the shortest path and Ctrl will trace via the longest path
(Tip S for Short and Shift)
When you hold down the Shift or Ctrl key and move the mouse near a point, QuickMap will display the potential latch path as a bold black line as shown in the example.