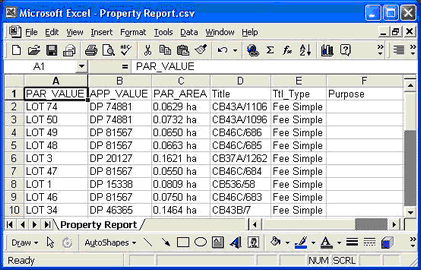
Available for Enterprise users only, the Reporting Tool enables users to produce customised property reports for areas of interest.
For example, create an Excel spreadsheet that contains a list of all the addresses, or legal descriptions, or owners, or geodetic marks within an area that has been defined.
The Reporting Tool is activated by pressing (Ctrl+R) or by selecting the Find Button from the Toolbar then clicking on the Report tab, or by selecting Find from the Menu Bar and clicking on Report .
Step 1
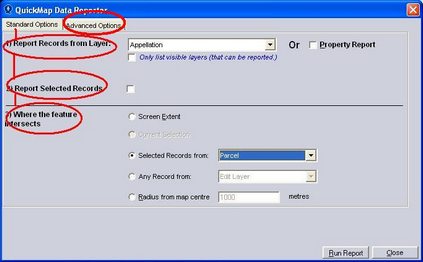
First choose which report you wish to run by selecting the report from the Report Records from Layer pull down list box. The most common report is the Appellation report which reports property information. The Property Report check box is a quick way to select the Appellation report.
Step 2
Report Selected Records
This option is available if features have been pre-selected.
Step 3
Choose the geographical area the report is constrained to by choosing one of the Where the feature intersects options. This can be one of five options:
Step 4
Set your Advanced options. The options include:
| • | Geometry Filter |
| • | Selecting records only without running a report |
Step 5
Click the Run Report button.
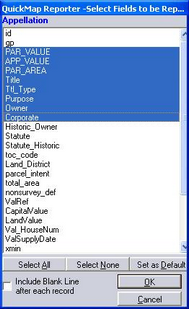
Click on the Fields in the list to add them into the report. Clicking on a highlighted Field will remove it from the report. When you have selected the Fields you want displayed, click the OK button. This will bring up the dialog box which will allow you to name and save the Report once created.
If the Advanced option chosen when you started the report was Open report when created your report will be displayed using the application associated with xls files for your operating system.