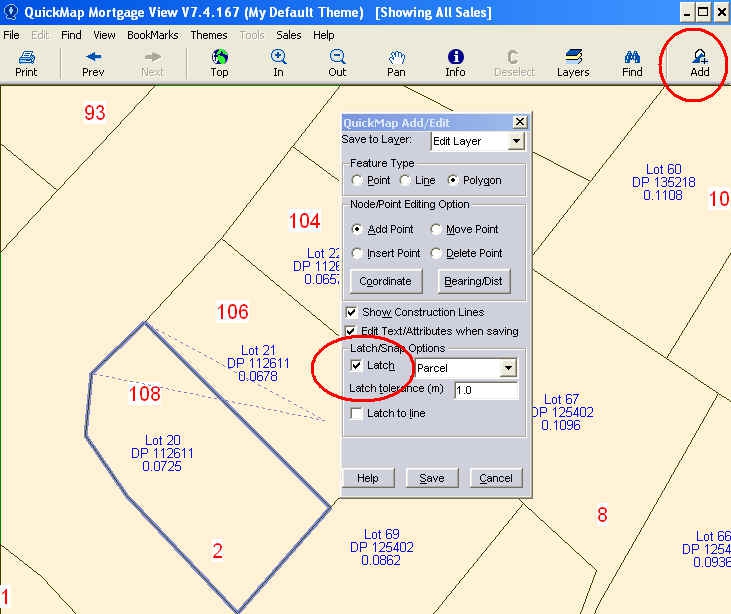
To add data to a custom layer in Quickmap, click on the Add button along the top tool bar, choose your feature type, Point, Line or Polygon. If you wish to latch onto the boundary points, tick on the Latch button within the Quickmap Add/Edit dialogue box.
On completion of your new added polygon, line or point click Save.
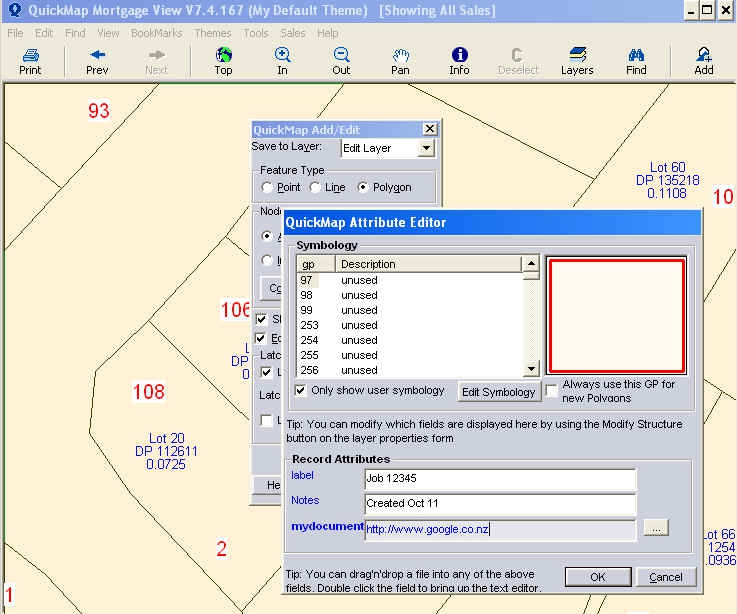
Add a label (i.e. Job Number) which can be shown and printed on the Quickmap and any relevant Notes (which will not be shown or printed). Hyperlinks to documents relating to the area can be added to mydocuments in the Edit Layer dialogue box.
❗ Note: The Information added in the Label can be searched on within Quickmap by clicking on Find -> Custom along the top tool bar.
A GP (graphic parameter) can be chosen to depict a different symbology for your various additions added to your custom layer. See the online help within Quickmap -> Help > Contents -> Changing The Way Your Maps Look By Using Symbology.
Using the Info Tool along the top tool bar, you can recall the edited information – this is shown within the Quickmap Report.


